

How To Download Kali Linux On Usb
Our favourite way, and the fastest method, for getting up and running with Kali Linux is to run it "live" from a USB bulldoze. This method has several advantages:
- It's not-destructive — information technology makes no changes to the host organisation's hard drive or installed Bone, and to go back to normal operations, you only remove the "Kali Live" USB drive and restart the system.
- It's portable — you can carry Kali Linux in your pocket and have it running in minutes on an available organisation
- Information technology'due south customizable — you can roll your own custom Kali Linux ISO paradigm and put it onto a USB drive using the same procedures
- It'southward potentially persistent — with a chip of actress effort, you tin can configure your Kali Linux "live" USB bulldoze to take persistent storage, and then the data you collect is saved across reboots
In lodge to do this, nosotros first demand to create a bootable USB drive which has been prepare from an ISO image of Kali Linux.
What You lot'll Demand
-
A verified re-create of the advisable ISO image of the latest Kali build epitome for the organization you lot'll exist running it on: run across the details on downloading official Kali Linux images.
-
If you're running under Linux, you can apply the
ddcontrol, which is pre-installed, or use Etcher. -
A USB thumb drive, 4GB or larger. (Systems with a direct SD card slot tin can utilise an SD card with similar capacity. The procedure is identical.)
Kali Linux Live USB Install Procedure
The specifics of this procedure will vary depending on whether you're doing it on a Windows, Linux, or macOS/OS X system.
Creating a Bootable Kali USB Drive on Linux (DD)
Creating a bootable Kali Linux USB drive in a Linux environment is like shooting fish in a barrel. Once y'all've downloaded and verified your Kali ISO file, y'all can apply the dd command to re-create it over to your USB drive using the following process. Annotation that you'll demand to be running as root, or to execute the dd command with sudo. The post-obit case assumes a Linux Mint 17.1 desktop — depending on the distro you're using, a few specifics may vary slightly, but the full general thought should exist very similar. If you would prefer to use Etcher, then follow the aforementioned directions as a Windows user. Annotation that the USB drive will have a path similar to /dev/sdb.
Alert: Although the process of imaging Kali Linux onto a USB bulldoze is very like shooting fish in a barrel, yous can only as hands overwrite a disk drive you didn't intend to with dd if yous do not understand what you are doing, or if y'all specify an incorrect output path. Double-check what y'all're doing before you practice information technology, information technology'll exist too late afterwards.
Consider yourself warned.
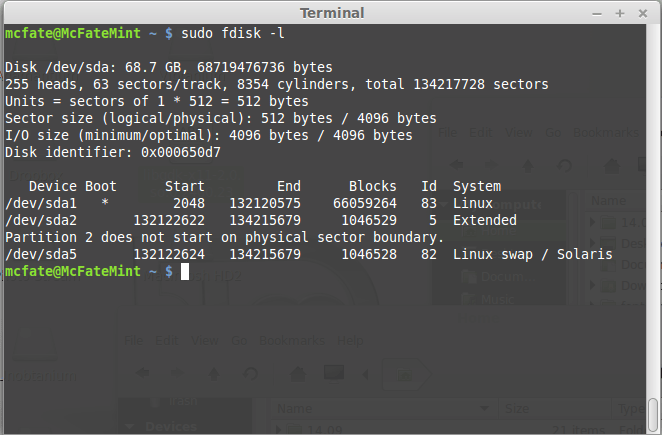
- First, you'll need to identify the device path to use to write the paradigm to your USB drive. Without the USB drive inserted into a port, execute the command
sudo fdisk -fiftyat a command prompt in a final window (if you don't employ elevated privileges with fdisk, you won't get any output). Y'all'll get output that volition look something (not exactly) like this, showing a unmarried drive — "/dev/sda" — containing 3 partitions (/dev/sda1, /dev/sda2, and /dev/sda5):
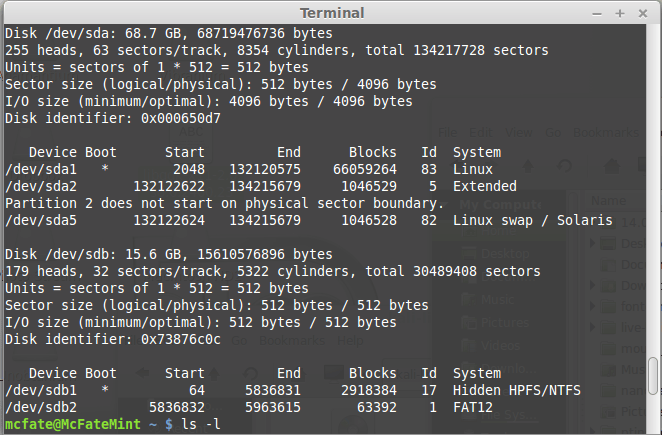
 ii. Now, plug your USB drive into an available USB port on your system, and run the same control, "sudo fdisk -l" a second time. Now, the output will look something (again, not exactly) like this, showing an boosted device which wasn't there previously, in this case "/dev/sdb", a 16GB USB drive:
 3. Proceed to (carefully!) image the Kali ISO file on the USB device. The example command below assumes that the ISO image you lot're writing is named "kali-linux-2022.one-live-amd64.iso" and is in your current working directory. The blocksize parameter can be increased, and while it may speed up the operation of the dd command, it tin can occasionally produce unbootable USB drives, depending on your system and a lot of dissimilar factors. The recommended value, "bs=4M", is bourgeois and reliable. Additionally, the parameter "conv=fsync" makes sure that the data is physically written to the USB drives before the commands returns.
[email protected]:~$ dd if=kali-linux-2022.one-live-amd64.iso of=/dev/sdb conv=fsync bs=4M Imaging the USB drive can accept a skillful amount of time, over ten minutes or more than is not unusual, as the sample output below shows. Be patient!
The dd command provides no feedback until it'southward completed, but if your bulldoze has an access indicator, yous'll probably meet information technology flickering from time to time. The fourth dimension to dd the epitome across will depend on the speed of the system used, USB drive itself, and USB port it's inserted into. One time dd has finished imaging the drive, information technology will output something that looks similar this:
5823+1 records in 5823+1 records out 3053371392 bytes (three.1 GB) copied, 746.211 s, 4.1 MB/s That's information technology, really!
Creating a Bootable Kali USB Bulldoze on Linux (DD with condition)
Alternatively in that location are a few other options available for imaging.
The get-go option is dd with a status indicator. This is but available on newer systems however. To practice this, nosotros simply add together the status flag.
[electronic mail protected]:~$ dd if=kali-linux-2022.ane-live-amd64.iso of=/dev/sdb conv=fsync bs=4M status=progress Some other option is to apply pv. Nosotros can also use the size flag here to get an approximate timer. Modify the size depending on the image being used.
[email protected]:~$ dd if=kali-linux-2022.1-live-amd64.iso | pv -due south 2.8G | dd of=/dev/sdb conv=fsync bs=4M Creating a Bootable Kali USB Drive on Linux (Etcher)
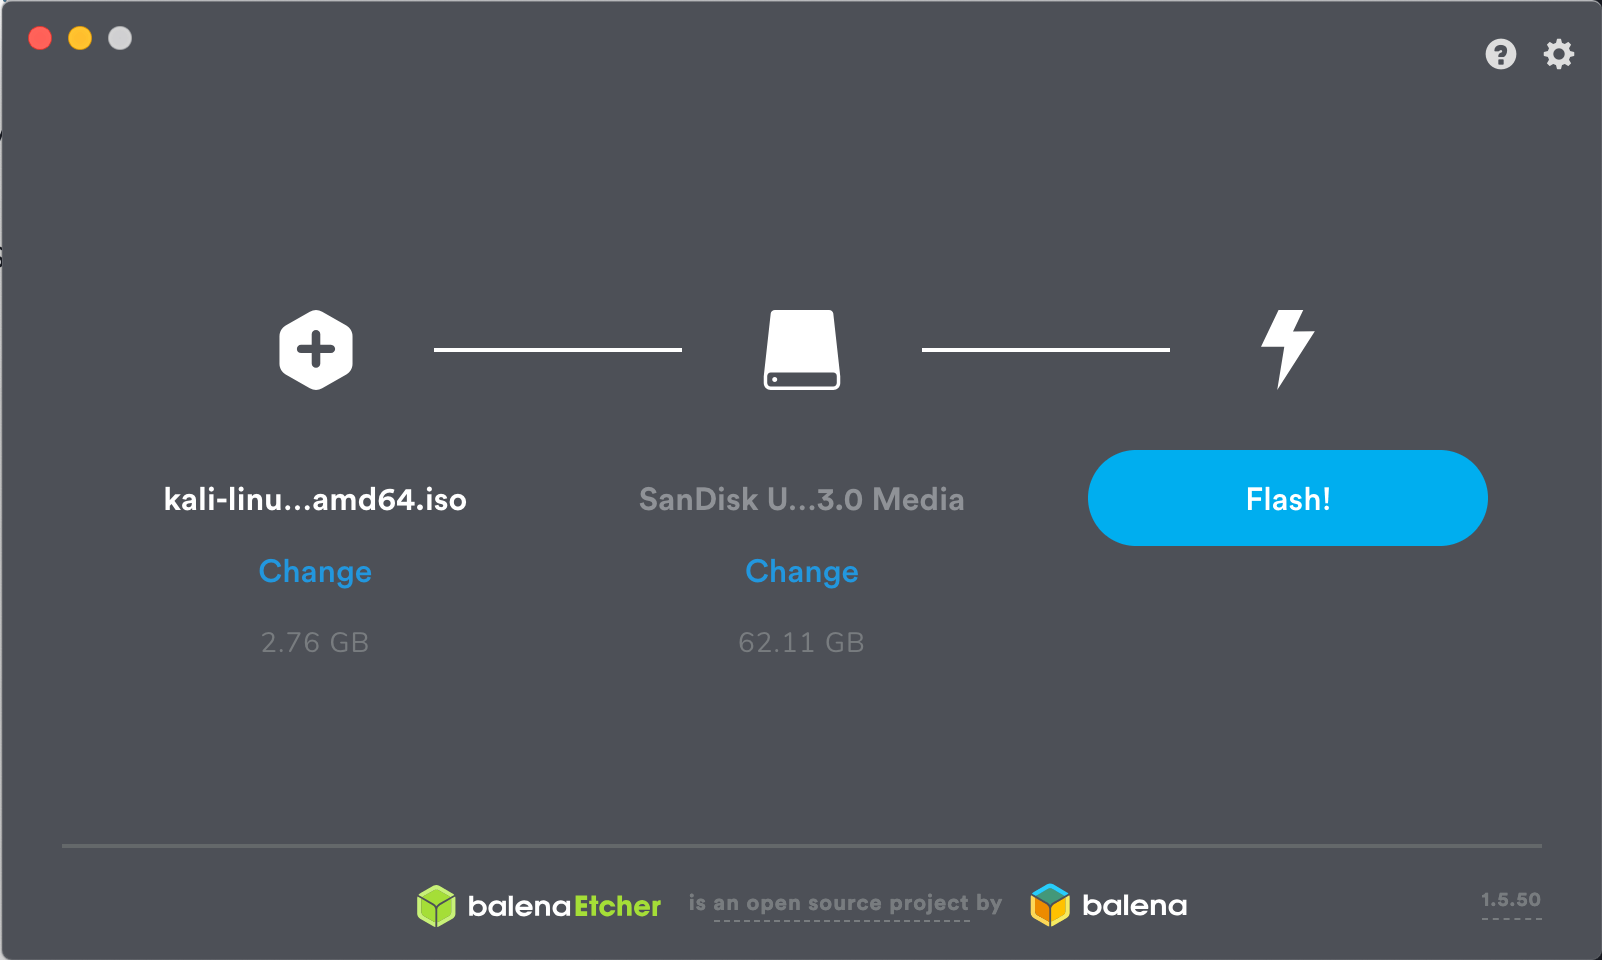
The third is Etcher.
-
Download and run Etcher.
-
Cull the Kali Linux ISO file to exist imaged with "select paradigm" and verify that the USB bulldoze to be overwritten is the correct i. Click the "Flash!" button once gear up.
 3. In one case Etcher alerts you that the epitome has been flashed, you can safely remove the USB drive.
Y'all tin now kicking into a Kali Live / Installer environment using the USB device.

Source: https://www.kali.org/docs/usb/live-usb-install-with-linux/
Posted by: harpersheastes.blogspot.com
0 Response to "How To Download Kali Linux On Usb"
Post a Comment